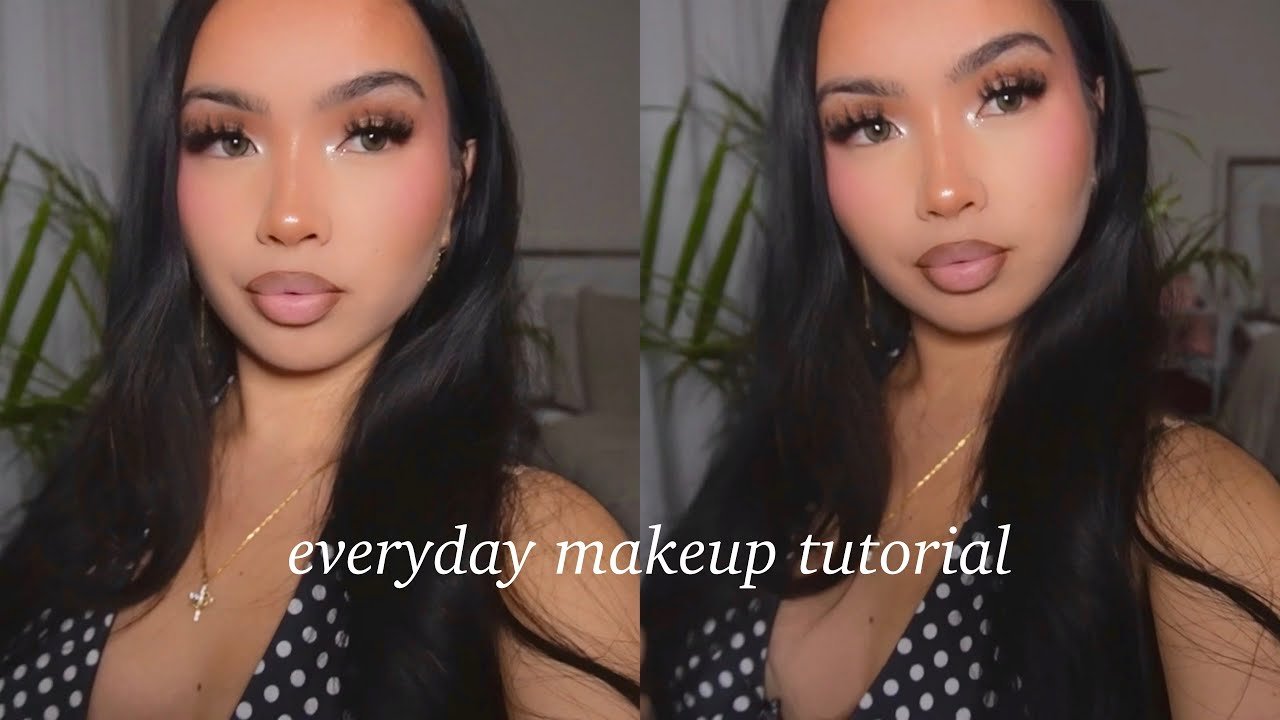
The baddie makeup look is all about two things: sharp, snatched brows and a glowy, luminous base that looks like your skin is lit from within. It’s polished but never overdone — the kind of makeup that says “I woke up like this,” even though it absolutely took twenty minutes and three products you swear by. Here’s how to nail both signature elements.
Step 1: Prep the Skin
Glowy skin starts before you touch a single product. Cleanse, then follow with a hydrating serum and a lightweight moisturizer. Skip anything too heavy or matte-finish — the goal is dewy, not flat. Let your moisturizer fully absorb before moving on, so your base doesn’t slip or pill later.
Step 2: Color Correct and Conceal (Sparingly)
Baddie makeup isn’t about masking your skin — it’s about enhancing it. Use a light hand with concealer, focusing only on areas that need it: under the eyes, around the nose, and any redness. A creamy, hydrating concealer blends seamlessly and won’t crease as the day goes on.
Step 3: Build a Skin-Like Base
Reach for a medium-coverage, dewy-finish foundation or a tinted skin tint. Apply with a damp sponge, bouncing the product into the skin rather than dragging it, which helps it look like skin rather than a mask. If you want more coverage, layer thin, then set only where needed.
Step 4: Sculpt with Cream Contour and Blush
Cream products are the baddie base’s best friend because they melt into the skin instead of sitting on top. Sculpt lightly under the cheekbones, along the jawline, and at the temples. Follow with a flush of cream blush high on the cheeks for that lit-from-within effect.
Step 5: Highlight Strategically
A liquid or cream highlighter dabbed on the high points of the face — cheekbones, brow bone, cupid’s bow, and the bridge of the nose — creates that glassy, glowing finish the look is known for. Less is more here; you want a glow, not glitter.
Step 6: The Snatched Brow
This is where the magic really happens. Start by brushing brows up and out with a spoolie to see their natural shape. Use a brow pencil or pomade to fill in sparse areas with short, hair-like strokes, then set with a tinted brow gel for hold. For an extra-sharp finish, apply a small amount of concealer just underneath the brow to clean up the edge and lift the arch — this single trick is what gives brows that crisp, “laminated” look.
Step 7: Soft, Smudged Eyes
Keep the eye makeup simple and smoky rather than sharp and graphic. A soft brown or bronze shadow blended through the crease, a touch of shimmer on the lid, and a light coat of mascara complete the eye without competing with the brows or the glow.
Step 8: Set Only Where Needed
Instead of an all-over powder, set only your T-zone and under-eyes with a light dusting of translucent powder. This keeps the rest of your skin looking dewy and natural rather than powdery or flat.
Step 9: Finish with a Nude or Glossy Lip
The baddie lip is usually understated — think warm nude, soft brown, or a clear gloss layered over a lip liner. This keeps the focus on the glowing skin and the brows, which are the real stars of the look.
The Takeaway
Baddie makeup isn’t about piling on product — it’s about strategic placement: cream products for glow, precise brow shaping for structure, and a light hand everywhere else. Master the brow and the base, and the rest of the look practically does itself.